Add a Calculated Field Legal Disclosures Templates For Free
How it works
-
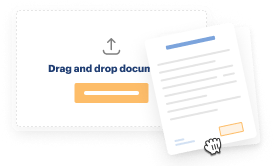
Import your Disclosures Forms from your device or the cloud, or use other available upload options.
-
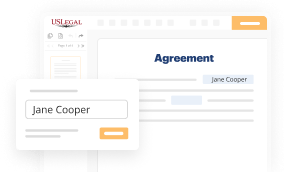
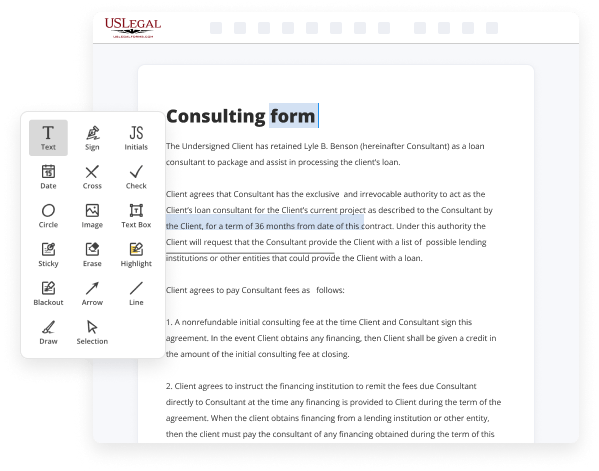
Make all necessary changes in your paperwork — add text, checks or cross marks, images, drawings, and more.
-

Sign your Disclosures Forms with a legally-binding electronic signature within clicks.
-
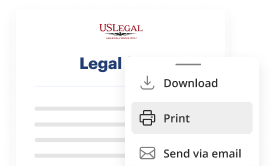
Download your completed work, export it to the cloud, print it out, or share it with others using any available methods.
How to Add a Calculated Field Legal Disclosures Templates For Free
Are you tired of constant document printing, scanning, postal delivery, and wasting precious time and resources with manual fill-out? The times have moved on, and the easiest way to Add a Calculated Field Legal Disclosures Templates For Free and make any other essential adjustments to your forms is by managing them online. Choose our quick and reliable online editor to complete, adjust, and execute your legal documentation with maximum efficiency.
Here are the steps you should take to Add a Calculated Field Legal Disclosures Templates For Free easily and quickly:
- Upload or import a file to the editor. Drag and drop the template to the upload area, import it from the cloud, or use an alternative option (extensive PDF catalog, emails, URLs, or direct form requests).
- Provide details you need. Complete blank fields using the Text, Check, and Cross tools from our top pane. Use our editor’s navigation to make certain you’ve filled in everything. Point out the most important facts with the Highlight option and erase or blackout fields with no value.
- Modify and rearrange the template. Use our upper and side toolbars to update your content, drop extra fillable fields for various data types, re-order pages, add new ones, or delete redundant ones.
- Sign and request signatures. No matter which method you select, your electronic signature will be legally binding and court-admissible. Send your form to other people for signing using email or signing links. Notarize the paperwork right in our editor if it needs witnessing.
- Share and save the copy. Download or export your completed documentation to the cloud in the file format you need, print it out if you prefer a physical copy, and select the most suitable file-sharing method (email, fax, SMS, or sent by snail mail using the USPS).
With our service, you don’t have any more excuses to prepare legal documents manually. Save time and effort executing them online twice as fast and more effectively. Give it a try now!

Benefits of Editing Disclosures Forms Online
Top Questions and Answers
Article Details Ensure the PDF form's fields names are exactly the same as the Excel document's. See the screenshot below. Go back to Excel, click ?File?-?Save As?-choose ?Save As Type? ?CSV UTF-8(Comma delimated)(. csv)?. Open the PDF file then go to ?Form?->?Import? then choose the test. csv file to import.
Video Guide to Add a Calculated Field Legal Disclosures Templates For Free
When working with intake forms for SharePoint lists it can be helpful to have sections to organize your data being input adding sections also helps you add multiple columns to the form which can help your user inputting data find the information much easier what I have here is a project signup form and when I click new item you'll
Notice all of the data appears in a single column based on the order of the columns I created in order to customize this I will go to the edit list dropped down here at the top and select configure layout and in the apply formatting two dropdown I will click body the body of the SharePoint list is what
Related Features
Tips to Add a Calculated Field Legal Disclosures Templates For Free
- Identify the specific legal disclosure items that require calculation.
- Determine the formula or logic needed for the calculated field.
- Access the template editor where you can modify legal disclosure templates.
- Click on the option to add a new calculated field to the template.
- Input the desired name for the calculated field to make it recognizable.
- Enter the formula using the correct syntax for calculations.
- Test the calculated field to ensure it works as expected before finalizing the template.
- Save the changes and review the template to confirm accuracy.
You may need to edit the template to add a calculated field when you require dynamic calculations for legal disclosures based on varying data inputs.
Related Searches
Navigate to All > Environmental, Social, and Governance > Administration > Disclosure Templates. Learn how to use the "Insert Calculated Field" button to evaluate calculations of data from Dynamics 365 with DCP. Follow our step-by-step guidance below for tips on how to draft simple but effective disclosure statements from scratch. Design and maintain disclosure document templates for environment, social, and governance (ESG) disclosures directly in Microsoft 365 Word. Learn how to manage securities templates on Carta, including document sets to attach to equity awards, vesting schedules and associated performance conditions. You use a calculated field template when you add a calculated field to a record type. The following templates are available. You can use aggregate functions only in calculated measures. Aggregates shouldn't be used to create non-measure fields. What Are Clear and Conspicuous Disclosures?
Industry-leading security and compliance
-
In businnes since 1997Over 25 years providing professional legal documents.
-
Accredited businessGuarantees that a business meets BBB accreditation standards in the US and Canada.
-
Secured by BraintreeValidated Level 1 PCI DSS compliant payment gateway that accepts most major credit and debit card brands from across the globe.
-
VeriSign secured#1 Internet-trusted security seal. Ensures that a website is free of malware attacks.