Add a Last a Name Field Word Accounts Receivables Templates For Free
How it works
-

Import your Accounts Receivables Forms from your device or the cloud, or use other available upload options.
-
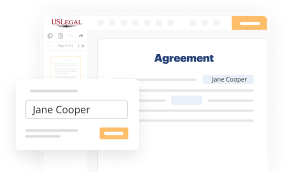
Make all necessary changes in your paperwork — add text, checks or cross marks, images, drawings, and more.
-

Sign your Accounts Receivables Forms with a legally-binding electronic signature within clicks.
-
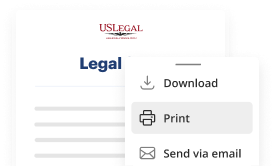
Download your completed work, export it to the cloud, print it out, or share it with others using any available methods.
How to Add a Last a Name Field Word Accounts Receivables Templates For Free
Are you tired of constant document printing, scanning, postal delivery, and wasting precious time and resources with manual fill-out? The times have moved on, and the best way to Add a Last a Name Field Word Accounts Receivables Templates For Free and make any other critical updates to your forms is by managing them online. Choose our quick and trustworthy online editor to complete, modify, and execute your legal paperwork with highest productivity.
Here are the steps you should take to Add a Last a Name Field Word Accounts Receivables Templates For Free quickly and effortlessly:
- Upload or import a file to the service. Drag and drop the template to the upload pane, import it from the cloud, or use an alternative option (extensive PDF library, emails, URLs, or direct form requests).
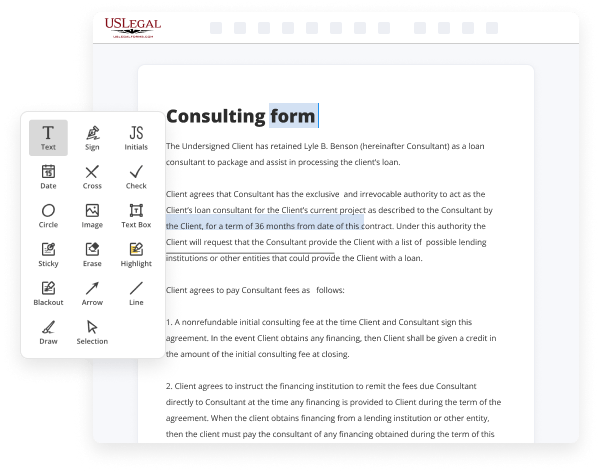
- Provide the required information. Fill out empty fields using the Text, Check, and Cross tools from our upper pane. Use our editor’s navigation to make certain you’ve completed everything. Accentuate the most important details with the Highlight option and erase or blackout fields with no value.
- Adjust and rearrange the form. Use our upper and side toolbars to update your content, place extra fillable fields for different data types, re-order sheets, add new ones, or remove redundant ones.
- Sign and collect signatures. No matter which method you choose, your eSignature will be legally binding and court-admissible. Send your form to other people for approval through email or signing links. Notarize the paperwork right in our editor if it needs witnessing.
- Share and save the copy. Download or export your completed paperwork to the cloud in the format you need, print it out if you prefer a hard copy, and select the most appropriate file-sharing option (email, fax, SMS, or delivered by snail mail using the USPS).
With our service, you don’t have any more excuses to accomplish legal documents manually. Save time and effort executing them online twice as quickly and more successfully. Give it a try now!

Benefits of Editing Accounts Receivables Forms Online
Top Questions and Answers
To insert a field: Position the insertion point where the field is to be added. Choose Insert -> Quick Parts -> Field. Select a field category from the Categories list. Select a field from the Field names list. If the field requires additional instructions, do one or both of the following:
Video Guide to Add a Last a Name Field Word Accounts Receivables Templates For Free
Welcome to another tech help video brought to you by accesslearningzone.com my name is richard ross your instructor in today's lesson i'm going to show you how to generate an accounts receivable report for your microsoft access order entry and invoicing database today's question comes from jamarcus from reno nevada one of my gold members jamarcus asks i've been using
Your invoicing template for a while now it's very helpful thank you you're welcome how can i generate an accounts receivables list based on the data in here well jamarcus an accounts receivable list is a fancy word for saying who still owes you money okay in a lot of businesses you have a cash system where i give you
Tips to Add a Last a Name Field Word Accounts Receivables Templates For Free
- Open your Accounts Receivables template in Word.
- Click on the section where you want to add the last name field.
- Go to the 'Insert' tab in the ribbon menu.
- Select 'Quick Parts' and then 'Field' from the dropdown.
- In the 'Field Names' list, choose 'MergeField'.
- In the 'Field Properties' box, type 'LastName' as the field name.
- Click 'OK' to insert the field into your template.
- Adjust the field's formatting if necessary, to fit your template design.
- Save your changes to the template.
This editing feature for adding a last name field in Accounts Receivables templates may be needed when you want to personalize invoices or documents for individual clients, ensuring that each document accurately reflects the recipient's details.
Related Searches
Click or tap where you want the merge field. () Add Merged Fields to Letter for First Name, Last Name and Balance Due 8. In Word, navigate to Insert > Field. When creating a template for Word or Excel, you can include custom merge fields that are based on tax information from Xero Tax. Download this free Accounts Receivable template to help you track, manage, and reconcile receivables more efficiently. Use the Cash Management Accounts Receivable Invoice template and make sure Cash Management approves your final design and coding structure. Sage Intacct allows you to create professional templates for Account Receivables Invoices, Sales Orders in Order Entry and Purchase Order in Purchasing, etc. Learn how to create a wellwritten accounts receivable resume and use some examples and templates to help guide you. Using an accounts receivable template helps you stay on top of credit sales to customers and track payments made. The second letter is sent between 3060 days past the due date.
Industry-leading security and compliance
-
In businnes since 1997Over 25 years providing professional legal documents.
-
Accredited businessGuarantees that a business meets BBB accreditation standards in the US and Canada.
-
Secured by BraintreeValidated Level 1 PCI DSS compliant payment gateway that accepts most major credit and debit card brands from across the globe.
-
VeriSign secured#1 Internet-trusted security seal. Ensures that a website is free of malware attacks.