Add Conditional Fields Word Personal Planning Templates For Free
How it works
-

Import your Personal Planning Forms from your device or the cloud, or use other available upload options.
-
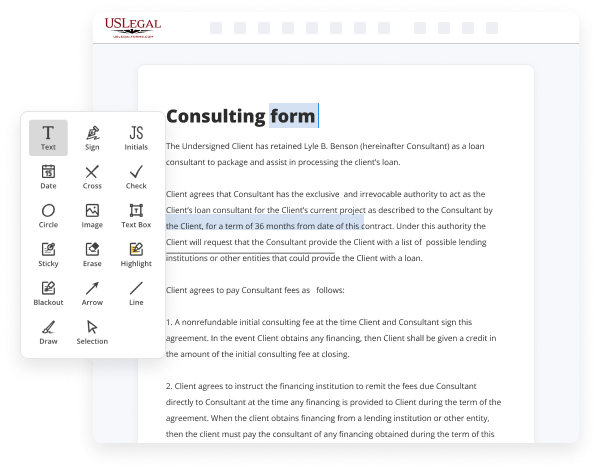
Make all necessary changes in your paperwork — add text, checks or cross marks, images, drawings, and more.
-

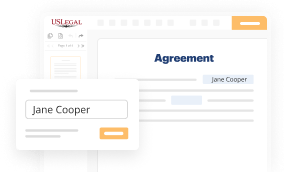
Sign your Personal Planning Forms with a legally-binding electronic signature within clicks.
-
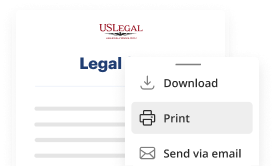
Download your completed work, export it to the cloud, print it out, or share it with others using any available methods.
How to Add Conditional Fields Word Personal Planning Templates For Free
Are you tired of endless document printing, scanning, postal delivery, and spending precious time and resources with manual fill-out? The times have moved on, and the best way to Add Conditional Fields Word Personal Planning Templates For Free and make any other essential changes to your forms is by managing them online. Take advantage of our quick and reliable online editor to fill out, edit, and execute your legal documentation with highest effectiveness.
Here are the steps you should take to Add Conditional Fields Word Personal Planning Templates For Free easily and quickly:
- Upload or import a file to the service. Drag and drop the template to the upload pane, import it from the cloud, or use an alternative option (extensive PDF library, emails, URLs, or direct form requests).
- Provide the required information. Complete blank fields utilizing the Text, Check, and Cross tools from our upper pane. Use our editor’s navigation to make certain you’ve completed everything. Point out the most important facts with the Highlight option and erase or blackout areas with no value.
- Adjust and rearrange the form. Use our upper and side toolbars to change your content, place extra fillable fields for various data types, re-order pages, add new ones, or delete redundant ones.
- Sign and request signatures. Whatever method you choose, your electronic signature will be legally binding and court-admissible. Send your form to other people for approval through email or signing links. Notarize the document right in our editor if it needs witnessing.
- Share and save the copy. Download or export your accomplished documentation to the cloud in the file format you need, print it out if you require a physical copy, and choose the most suitable file-sharing method (email, fax, SMS, or delivered by snail mail using the USPS).
With our service, you don’t have any more excuses to accomplish legal documents manually. Save time and effort executing them online twice as quickly and more efficiently. Try it out now!

Benefits of Editing Personal Planning Forms Online
Top Questions and Answers
For Windows users: Open Microsoft Word. Go to the Insert tab. Click Quickparts and select Field... from the dropdown. Under the Field names list, select If. Under Field Codes, enter your conditional statement. For example: IF "{{ADDRESS_BILLING_CITY}}" = "San Francisco" "Home" "Away" Click OK.
Video Guide to Add Conditional Fields Word Personal Planning Templates For Free
Hello and welcome to today's webinar how to use if statements in Microsoft Word templates my name is Rob Easton I'm one of the six guys named Robert here at conga I'm on the business analyst I'm at business analyst on the new business team there's my email address and I decided to throw a photo in there primarily to
Embarrass my daughter I also wear that floppy hat also to embarrass my daughter and somehow I talked her into going hiking with me anyway here's our agenda for today we want to talk a little bit about best practice for conditional operations you win using Salesforce we're gonna reference the some online documentation for for feature follow-up we're also
Related Features
Tips to Add Conditional Fields Word Personal Planning Templates For Free
- Specify the conditions under which the field should appear
- Use IF statements to set the conditions for showing/hiding fields
- Consider using VBA macro for more complex conditional fields
- Test your template thoroughly to ensure that the conditional fields work as expected
Adding conditional fields to Word Personal Planning Templates can help customize the template based on specific criteria or user input. This feature may be needed when you want to show or hide certain fields depending on the information provided, making the template more dynamic and user-friendly.
Related Searches
I'm trying to modify the RM Statement on Blank Paper Word Template. You use the XML Mapping Pane to add entity fields to your Word template. Be sure to only add fields as Plain Text or Picture. Go to the Insert tab. Step 1: Enable the Developer tab ; 2. Follow these steps to create a conditional section. On the Set up the template panel, select Conditional section. The easiest way would adding a new variable to context like Personal_Age_int which holds just 18 and can be compared in the template. This blog article covers a StepbyStep example on how to set conditions in DocumentsCorePack Template Designer for your template. Conditional logic allows you to create multiple variations of a document all in one template.
Industry-leading security and compliance
-
In businnes since 1997Over 25 years providing professional legal documents.
-
Accredited businessGuarantees that a business meets BBB accreditation standards in the US and Canada.
-
Secured by BraintreeValidated Level 1 PCI DSS compliant payment gateway that accepts most major credit and debit card brands from across the globe.
-
VeriSign secured#1 Internet-trusted security seal. Ensures that a website is free of malware attacks.