Add Date To Word Court Templates For Free
How it works
-

Import your Court Forms from your device or the cloud, or use other available upload options.
-
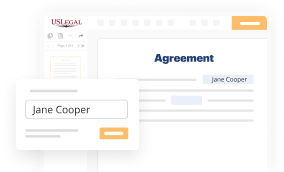
Make all necessary changes in your paperwork — add text, checks or cross marks, images, drawings, and more.
-

Sign your Court Forms with a legally-binding electronic signature within clicks.
-
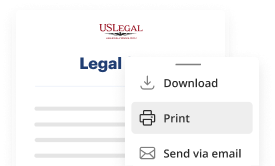
Download your completed work, export it to the cloud, print it out, or share it with others using any available methods.
How to Add Date To Word Court Templates For Free
Are you tired of endless document printing, scanning, postal delivery, and spending precious time and resources with manual fill-out? The times have moved on, and the best way to Add Date To Word Court Templates For Free and make any other essential updates to your forms is by handling them online. Choose our quick and trustworthy online editor to complete, modify, and execute your legal paperwork with highest productivity.
Here are the steps you should take to Add Date To Word Court Templates For Free quickly and effortlessly:
- Upload or import a file to the editor. Drag and drop the template to the upload pane, import it from the cloud, or use another option (extensive PDF catalog, emails, URLs, or direct form requests).
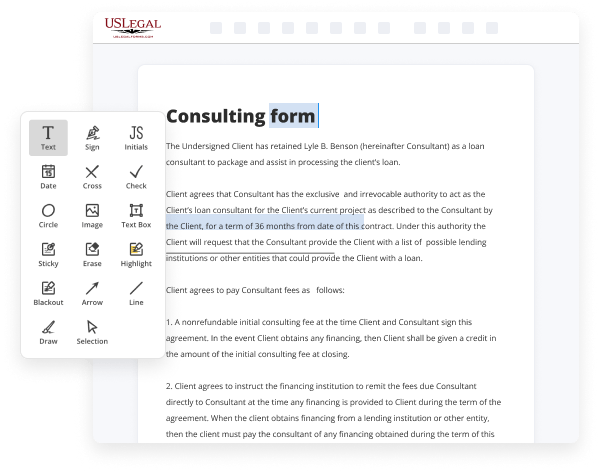
- Provide details you need. Fill out empty fields utilizing the Text, Check, and Cross tools from our upper pane. Use our editor’s navigation to ensure you’ve filled in everything. Point out the most significant details with the Highlight option and erase or blackout fields with no value.
- Modify and rearrange the form. Use our upper and side toolbars to change your content, place extra fillable fields for various data types, re-order sheets, add new ones, or delete redundant ones.
- Sign and collect signatures. No matter which method you select, your eSignature will be legally binding and court-admissible. Send your form to other people for signing using email or signing links. Notarize the document right in our editor if it needs witnessing.
- Share and save the copy. Download or export your accomplished paperwork to the cloud in the file format you need, print it out if you require a hard copy, and select the most appropriate file-sharing method (email, fax, SMS, or delivered by snail mail using the USPS).
With our service, you don’t have any more excuses to accomplish legal documents manually. Save time and effort executing them online twice as fast and more properly. Give it a try now!

Benefits of Editing Court Forms Online
Top Questions and Answers
Insert the date and time a document was created, last printed, or... Click where you want to insert the date or time. On the Insert tab, in the Text group, click Quick Parts, and then click Field. In the Categories box, select Date and Time. In the Field names box, select CreateDate, PrintDate, or SaveDate.
Video Guide to Add Date To Word Court Templates For Free
Foreign if you have a template or other type of document that regularly requires a day to be updated you can make the Microsoft Word display a date that automatically updates so if you want to learn more about that feature you can follow these steps in this video now first launch your Microsoft Word on your device and then
Open any document or the document you're currently working on then place the mouse cursor in the area where you would like the date to appear select the insert tab and under the text group select quick parts then choose insert field in the categories window you have to select date and time so all you have to do is
Related Features
Tips to Add Date To Word Court Templates For Free
- Open the Word Court Template you want to edit
- Click on the location where you want to add the date
- Go to the 'Insert' tab on the top menu bar
- Choose 'Date & Time' from the options
- Select the format you want the date to appear in
- Click 'OK' to insert the date into the template
- Save the changes to the template
It is important to keep your Word Court Template updated with the most recent date, especially when submitting legal documents that require accurate timing and record-keeping. Adding the date to your template ensures that the information is current and relevant for the recipient.
Related Searches
Insert a CreateDate field in the template. You can go through Insert > Quick Parts > Field, but it's quicker just to press Ctrl+F9 to make a ... On a PC, navigate to where you want to enter the date field and then press on Shift + Alt + D together. On a Mac, press on Shift + Ctrl + D. Important: The date ... 3 Court Document Templates; 4 When do you need a pleading paper? ... The next step is to sign the document and add the date. Using the Date field will add 'today's date' when the document is created from the template/stationery, but it will reset the date to the current date whenever ... See how Lawyaw helps law firms convert their existing Word documents into fillable templates that can be completed easily and accurately in minutes. The Easier Way to Complete Court Forms for Lawyers ... Access thousands of up-to-date forms in our library. tick icon inside a blue circle. Learn how to create a fillable form in Microsoft Word using the Developer tab with this easy to follow tutorial. Finding court forms The California court system uses forms to ensure everyone's information is ... Download a Microsoft Word template for pleading paper. All Judicial Council forms have a date on the bottom left corner. This is the date that the form was last updated. Court forms at ... Download a Microsoft Word template for pleading paper. You can also ask your court's Self-Help Center or public law library for a sample or blank pleading ...
Industry-leading security and compliance
-
In businnes since 1997Over 25 years providing professional legal documents.
-
Accredited businessGuarantees that a business meets BBB accreditation standards in the US and Canada.
-
Secured by BraintreeValidated Level 1 PCI DSS compliant payment gateway that accepts most major credit and debit card brands from across the globe.
-
VeriSign secured#1 Internet-trusted security seal. Ensures that a website is free of malware attacks.