Add Option Field Word Personal Injury Templates For Free
How it works
-

Import your Personal Injury Forms from your device or the cloud, or use other available upload options.
-

Make all necessary changes in your paperwork — add text, checks or cross marks, images, drawings, and more.
-

Sign your Personal Injury Forms with a legally-binding electronic signature within clicks.
-

Download your completed work, export it to the cloud, print it out, or share it with others using any available methods.
How to Add Option Field Word Personal Injury Templates For Free
Are you tired of endless document printing, scanning, postal delivery, and wasting precious time and resources with manual fill-out? The times have moved on, and the best way to Add Option Field Word Personal Injury Templates For Free and make any other essential updates to your forms is by handling them online. Choose our quick and secure online editor to complete, edit, and execute your legal paperwork with highest efficiency.
Here are the steps you should take to Add Option Field Word Personal Injury Templates For Free easily and quickly:
- Upload or import a file to the editor. Drag and drop the template to the upload area, import it from the cloud, or use another option (extensive PDF library, emails, URLs, or direct form requests).
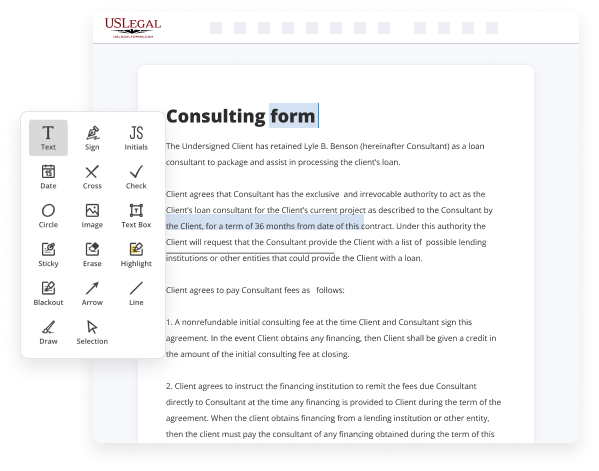
- Provide details you need. Fill out blank fields utilizing the Text, Check, and Cross tools from our top pane. Use our editor’s navigation to ensure you’ve filled in everything. Point out the most important details with the Highlight option and erase or blackout areas with no value.
- Adjust and rearrange the form. Use our upper and side toolbars to update your content, drop additional fillable fields for various data types, re-order sheets, add new ones, or delete redundant ones.
- Sign and collect signatures. No matter which method you choose, your eSignature will be legally binding and court-admissible. Send your form to others for signing using email or signing links. Notarize the document right in our editor if it needs witnessing.
- Share and save the copy. Download or export your accomplished paperwork to the cloud in the format you need, print it out if you require a hard copy, and choose the most appropriate file-sharing method (email, fax, SMS, or sent by snail mail using the USPS).
With our service, you don’t have any more excuses to prepare legal documents manually. Save time and effort executing them online twice as fast and more properly. Give it a try now!


Benefits of Editing Personal Injury Forms Online
Top Questions and Answers
To add a content control to a document in Word On the Ribbon, click the Developer tab. If the Developer tab is not visible, you must first show it. For more information, see How to: Show the Developer tab on the Ribbon. In the Controls group, click the icon for the content control that you want to add.
Video Guide to Add Option Field Word Personal Injury Templates For Free
If you were to print a copy of your document, and ask a friend to proofread it, they'd probably mark the errors in red pen, and write any suggestions they had in the margins. Wouldn't it be easier if you could do that electronically? In Word, you can—using two features called Track Changes and Comments. I'm going to turn on
Track changes right now so I can show you what I mean. To do this, go to the Review tab… then click the Track Changes command. Now any changes I make to the document will appear as "markup," which is Word's answer to the traditional red pen. For example, when I delete text, it doesn't go away… it just gets

Tips to Add Option Field Word Personal Injury Templates For Free
- Open your Personal Injury Template in Word.
- Navigate to the place in the document where you want to add the option field.
- Go to the 'Developer' tab in the ribbon. If you don't see it, enable it in Word options.
- Click on 'Legacy Tools' and choose 'Drop-Down List Content Control.'
- Customize the options by clicking 'Properties' and adding your choices.
- You can format the option field to match the document's style.
- Save your template after making changes.
You may need this editing feature when you want to make your Personal Injury Templates more interactive and user-friendly for others filling them out.
Related Searches
Go to Microsoft Forms and sign in with your Microsoft account. 2. Start a new form or quiz. 3. Learn how to create custom, autopopulating documents for all your Personal Injury cases! You can use a drop-down list box in a Microsoft Office InfoPath form template to present a list of mutually exclusive choices to a user. This blog will cover Microsoft Word tips for lawyers and some of our top tricks, hacks, and basic shortcuts we think all attorneys should know about. Go to Layout and choose the Size option. There, you'll find a Legal option that will format your document in the 8.5 x 14 inch size. Modify your documents and Insert Dropdown Menu Fields in the Accident Medical Claim Form on any device without breaking a sweat. Yes you can use a mapped content control to insert a field into a document that will update the title document property when changed. In this Microsoft Word intermediate tutorial, I will show you how to make a fillable form in Microsoft Word.
Industry-leading security and compliance
-
In businnes since 1997Over 25 years providing professional legal documents.
-
Accredited businessGuarantees that a business meets BBB accreditation standards in the US and Canada.
-
Secured by BraintreeValidated Level 1 PCI DSS compliant payment gateway that accepts most major credit and debit card brands from across the globe.
-
VeriSign secured#1 Internet-trusted security seal. Ensures that a website is free of malware attacks.